Как правильно покрасить автомобиль: пошаговая инструкция для домашней покраски
Anna Tkach
AutoPortal editorial team
436 views
2 min read
Покраска автомобиля - процесс трудоёмкий, но выполнимый в домашних условиях при правильной подготовке и соблюдении технологии. В этом материале разберём, как покрасить автомобиль в холодном гараже, на улице или дома, используя баллончик или покрасочный пистолет, и какие этапы нельзя пропускать, чтобы получить качественный результат.
1. Подготовка автомобиля к покраске
Правильная подготовка - залог качественного покрытия. Перед тем как покрасить автомобиль:
Вымойте кузов и удалите все загрязнения, жир и пыль.
Зачистите старую краску и ржавчину наждачной бумагой или шлифовальной машинкой.
Используйте шпаклёвку для выравнивания вмятин и дефектов кузова.
Очистите и обезжирьте поверхность перед нанесением грунта.
На этом этапе важно действовать аккуратно: самостоятельно зачистить и подготовить кузов - ключ к равномерной покраске.
2. Грунтовка кузова
После зачистки и выравнивания поверхности нанесите грунт:
Выбирайте грунт по типу краски (акриловый, эпоксидный).
Наносите равномерно в 2-3 слоя, с промежуточной сушкой.
Обязательно зачистите грунт мелкой наждачной бумагой перед основной покраской.
Грунтовка улучшает сцепление краски с металлом и предотвращает ржавчину.
3. Выбор краски
Выбор краски зависит от того, какой результат вы хотите получить:
Баллончик - удобно для локальных работ и небольшого ремонта.
Металлик - требует ровного слоя и равномерного нанесения, особенно в холодном гараже.
Покрасочный пистолет - подходит для полноценной покраски всей машины.
При покраске металликом учитывайте направление света и избегайте потёков.
4. Нанесение краски
Технология нанесения зависит от условий:
В гараже: обеспечьте хорошее проветривание, температуру около 20°С, используйте маску и перчатки.
На улице: выбирайте сухой день без ветра, чтобы пыль не осела на свежую краску.
Распыляйте краску плавными движениями, перекрывая каждый предыдущий слой на 50-70%.
Держите баллончик или пистолет на постоянном расстоянии 20-30 см от поверхности.
Нанесение нескольких тонких слоев лучше, чем один толстый - так краска ляжет ровно и без подтёков.
5. Сушка и полировка
После нанесения краски:
Дайте каждому слою высохнуть согласно инструкции производителя.
После полного высыхания можно нанести лак для защиты и придания блеска.
Для металлических оттенков лак особенно важен - он выравнивает поверхность и усиливает эффект.
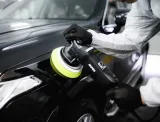
После высыхания можно самостоятельно отполировать кузов мягкой тканью или полировальной машинкой.
Правильная сушка и полировка гарантируют долговечность покрытия.
6. Дополнительные советы
При покраске на холоде используйте подогреватели или лампы для равномерного высыхания.
Для локальных ремонтов лучше красить на улице или в гараже с открытой дверью, чтобы избежать конденсата.
Всегда работайте в защитной маске и перчатках - краска токсична.
Чтобы покрасить автомобиль правильно, не торопитесь: торопливость приведёт к потёкам и неравномерному покрытию.
7. Итог
Теперь вы знаете, как покрасить автомобиль в домашних условиях и на улице, используя баллончик или покрасочный пистолет. Основные этапы:
Зачистка и подготовка кузова.
Нанесение грунта.
Выбор и нанесение краски.
Сушка, лак и полировка.
Следуя этой технологии, можно получить красивое и ровное покрытие без профессионального бокса.