Как отрегулировать фары без стенда и без корректора?
Anna Tkach
AutoPortal editorial team
2,614 views
3 min read
Правильная регулировка автомобильных фар - это не только комфорт водителя, но и безопасность всех участников движения. Неправильно настроенные световые приборы могут ослеплять встречных водителей или, наоборот, давать слишком короткий пучок света, уменьшая видимость дороги. Многие автолюбители думают, что без специального оборудования выполнить настройку невозможно. На самом деле есть несколько проверенных способов, как правильно отрегулировать фары своими руками, без стенда и без корректора.
Почему важна регулировка фар
Даже если у вас установлены современные LED фары или оптика с линзами, со временем её положение может сбиваться из-за вибраций, замены ламп или ремонта подвески. Особенно это актуально после ДТП или установки новых деталей кузова. Чтобы ездить безопасно, необходимо знать, как отрегулировать фары ближнего света и дальнего, а также противотуманные огни.
Подготовка к регулировке
Перед началом работы нужно убедиться, что автомобиль загружен так, как вы обычно его используете: полный бак топлива, водитель на сиденье, при необходимости груз в багажнике. Давление в шинах должно быть нормальным. Автомобиль ставится на ровную площадку перед гладкой стеной или воротами гаража. Оптимальное расстояние - около 5 метров. На стене нужно начертить схему:
горизонтальная линия на уровне центра фар;
вертикальные линии, совпадающие с центром каждой фары;
дополнительная линия на 5-10 см ниже основной - для контроля наклона ближнего света.
Как правильно отрегулировать фары на машине
Чтобы понять, как правильно отрегулировать фары на машине, включите ближний свет и наблюдайте за световым пучком. Левая граница должна быть прямой и находиться чуть ниже уровня центров фар. Правая часть пучка, наоборот, должна подниматься вверх, чтобы подсвечивать обочину. Если свет отклоняется в сторону или слишком высоко, используйте регулировочные винты, расположенные рядом с блок-фарой. Один отвечает за вертикаль, другой за горизонталь. Медленно вращая их, выставьте свет по нанесённым линиям.
Как отрегулировать фары без корректора
Многие машины оснащены корректором фар, который позволяет изменять наклон света прямо из салона. Но если он неисправен или отсутствует, можно легко выполнить настройку вручную. Здесь пригодится схема на стене. Нужно лишь добиться того, чтобы световой пучок совпадал с линиями разметки. Важно проверять оба фонаря по отдельности: для этого временно закройте одну фару картоном или тканью и настраивайте вторую.
Как отрегулировать фары на Ланосе
Владельцы часто интересуются, как отрегулировать фары на Ланосе. Здесь принцип тот же, что и у других автомобилей, но стоит учитывать: на Ланосе регулировочные винты расположены сверху фары, и иногда доступ к ним ограничен элементами подкапотного пространства. Поэтому лучше запастись удлинённой отвёрткой или торцевым ключом.
Как отрегулировать фары ближнего света и дальнего
Для ближнего света важнее всего чёткая граница светотеневой линии, поэтому именно её настраивают в первую очередь. Дальний свет проверяется по центру вертикальных линий на стене - пучок должен быть строго посередине, без ухода влево или вправо. Если у вас установлены фары с линзами, процесс не отличается, но граница светового пучка обычно более резкая, что облегчает регулировку. А вот владельцам автомобилей с галогенками или устаревшими отражателями нужно быть внимательнее, так как свет может рассеиваться.
Как отрегулировать LED фары
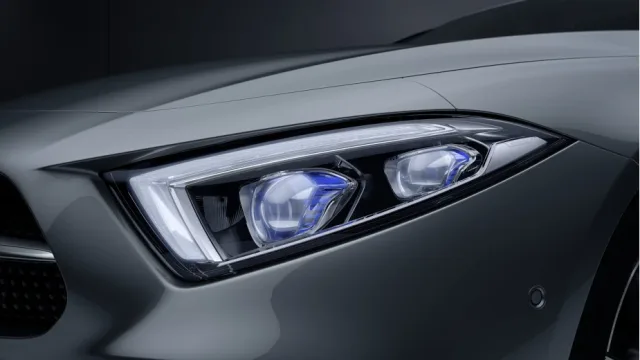
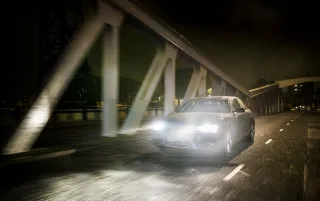
Современные LED фары дают яркий и насыщенный поток света, но именно поэтому их особенно важно правильно настраивать. Неправильная регулировка приводит к сильному ослеплению встречного транспорта. Для LED-оптики требования такие же: левая линия чуть ниже уровня фар, правая подсвечивает обочину. Проверяйте результат в темноте на пустой дороге: свет должен быть ярким, но не мешать другим.
Как отрегулировать противотуманные фары
Отдельно стоит сказать о ПТФ. Многие водители задаются вопросом, как отрегулировать противотуманные фары. Их пучок должен быть низким и широким, чтобы подсвечивать дорогу под туманом или дождём. Для регулировки машину ставят на расстоянии 3 метров от стены и добиваются, чтобы свет находился ниже линии фар ближнего света.
Как отрегулировать фары на КамАЗе
Для грузовиков процедура аналогична, но есть нюансы. Чтобы понять, как отрегулировать фары на КамАЗе, нужно учитывать высокую посадку машины. Поэтому отмеряют расстояние не 5, а 10 метров до стены. Регулировочные винты находятся сбоку фар, и доступ к ним свободнее, чем на легковых автомобилях.
Итог
Теперь вы знаете, как правильно отрегулировать фары без стенда и без корректора: достаточно ровной стены, мела и немного терпения. Независимо от того, регулируете ли вы ближний, дальний, противотуманный свет, фары на Ланосе или на КамАЗе, с линзами или LED - принцип остаётся одинаковым. Главное - правильно выставить машину, отметить линии на стене и аккуратно работать с винтами.