Подготовка бампера к покраске
Перед тем как приступить, нужно тщательно подготовить поверхность:- Снять бампер - это облегчит работу и позволит равномерно нанести краску.
- Вымыть деталь с мылом или автошампунем, удалив грязь, пыль, следы битума.
- Зачистить мелкой наждачной бумагой (P400-P800), убрав старое покрытие, неровности и царапины.
- Обезжирить поверхность антисиликоном или уайт-спиритом.
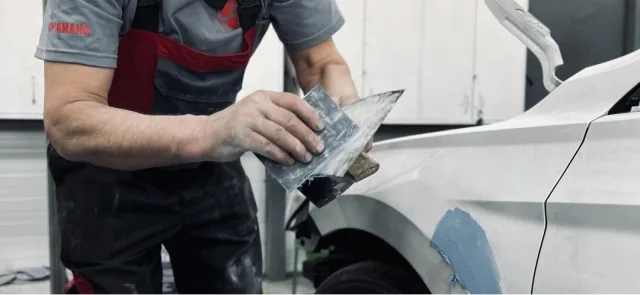
- При необходимости зашпаклевать трещины и сколы, после высыхания снова прошлифовать.
Как покрасить пластиковый бампер баллончиком
Использование аэрозольных красок - самый доступный вариант для ремонта в гараже или на даче. Процесс следующий:- После подготовки поверхности нанести пластиковый праймер - он улучшит сцепление краски с бампером.
- Наносить краску баллончиком с расстояния 20-30 см, двигаясь плавно и не задерживаясь на одном месте.
- Делать несколько тонких слоёв (обычно 3-4), давая каждому просохнуть 10-15 минут.
- После окраски нанести 2-3 слоя лака для защиты и блеска.
- Дать детали просохнуть минимум сутки перед установкой.
Как самому локально покрасить бампер
Локальная покраска используется при ремонте небольших сколов или царапин:- Ограничить область ремонта малярным скотчем и бумагой, чтобы не запачкать соседние участки.
- Зачистить повреждение до ровной поверхности.
- Обезжирить и нанести грунт.
- Подобрать цвет в тон кузова по коду краски.
- Локально нанести краску, слегка заходя на границы старого покрытия.
- Покрыть участок лаком, затем после высыхания отполировать переход.
Как покрасить бампер ВАЗ 2108 и ВАЗ 2109
У этих моделей бамперы чаще пластиковые, поэтому технология та же, что и при покраске баллончиком. Для долговечности покрытия:- Используйте праймер для пластика.
- Выбирайте акриловую или базовую краску.
- При структурной покраске наносите материал толстыми слоями для создания рельефа.
Как покрасить бампер структурной краской
Структурная краска создаёт шершавое, матовое покрытие, которое скрывает мелкие дефекты:- Подготовить поверхность (мойка, шлифовка, обезжиривание).
- Нанести праймер.
- Распылять структурную краску с расстояния 25-30 см, формируя равномерный рельеф.
- Дать высохнуть 24 часа.
Советы по самостоятельной покраске
- Работайте в сухом и чистом помещении, при температуре 18... 25 °C.
- Перед использованием баллончик нужно хорошо встряхнуть.
- При покраске баллончиком делайте быстрые, перекрывающиеся движения.
- Не наносите слишком толстые слои - это вызывает потёки.
- После покраски не мойте машину хотя бы неделю.
Если знать технологию, покрасить бампер самому можно и в гаражных условиях. Для быстрого и бюджетного ремонта подойдёт покраска пластикового бампера баллончиком, для реставрации старых деталей - структурная краска, а при небольших повреждениях лучше выполнить локальный ремонт. Главное - тщательно подготовить поверхность и работать аккуратно.